Create a Parser
Learn how to create a Parser in PerfectParser — name it, optionally pick a document type, upload a sample, and set up extraction fields.
A Parser is your custom data extractor. You set up one Parser per document layout or use case — for example, one for supplier invoices and another for delivery notes. Once configured, you can process many documents through the same Parser.
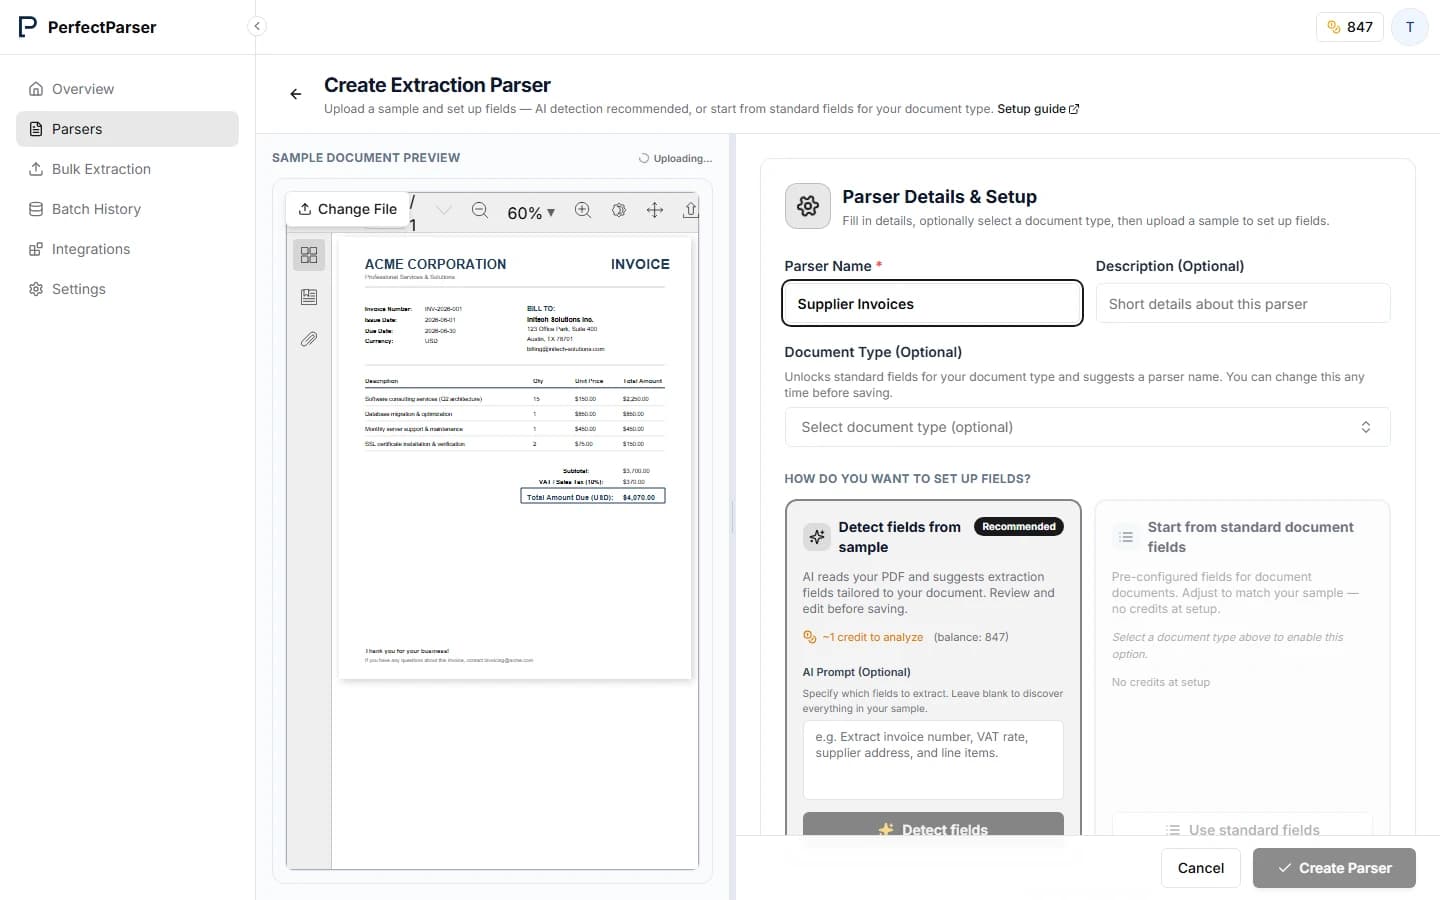
Step 1: Open the create page
- Sign in to your PerfectParser dashboard.
- Click Parsers in the left-hand sidebar.
- Click New Parser in the top-right corner.
Step 2: Name your parser
Give your Parser a clear, descriptive name. If you select a document type, a default name (e.g. Invoice Parser) may be suggested.
| Good name | Why it works |
|---|---|
| Vendor Invoices (EU) | Specific to document type and region |
| Purchase Orders: Acme Corp | Specific to supplier |
| Bank Statements (GBP) | Specific to currency/format |
Use a name that reflects the document type and any distinguishing detail (supplier, country, format). You can rename the parser later.
Step 3: Select a document type (optional)
The Document Type dropdown lists common categories — Invoice, Receipt, Bank Statement, and more.
| What it does | What it does not do |
|---|---|
| Suggests a parser name | Force a fixed field list during AI detection |
| Unlocks standard fields (pre-configured schema) | Replace uploading a sample |
| Links to setup guides for that document type | Limit which fields AI can find when instructions are left blank |
You can skip document type and still use Detect fields from sample on any document.
Step 4: Upload a sample document
Upload one representative file in the left panel. PerfectParser uses it to compare fields and to power AI detection.
- Accepted formats: PDF, PNG, JPG, JPEG
- Best results: a real document with typical content (not a blank template)
- A sample is required before you can save the parser
Step 5: Set up fields
After the sample finishes uploading, choose how to build your field list:
Detect fields from sample (recommended)
AI reads your document and suggests fields. Optionally add an AI Prompt to focus field detection; leave it empty to discover everything in the sample.
Uses page credits — the estimate is shown before you click Detect fields.
Start from standard fields
Available when a document type is selected. Loads a pre-configured field list for that type (no credits at setup). Compare with your sample and adjust.
Start with empty fields
Build the schema manually using Add Text Field, Add Number Field, Add Table, and Add Section.
For details on field types and editing, see Configure Fields — especially Field types explained.
Step 6: Save and extract
- Review fields in the schema editor (names, types, descriptions).
- Click Create Parser.
- On the parser detail page, open the Extract tab to upload documents for processing and to choose How are your files organized? (One document per file vs One document per page).
File organization is configured when you run extractions (Bulk Extraction or the parser Extract tab), not during parser creation. See Bulk Extraction for multi-page and batch scenarios.
Related guides
- Configure Fields — Refine fields, types, and descriptions
- Parser setup guides — Recommended fields per document type
- Bulk Extraction — Process documents and choose extraction mode